Whether you’re new to WordPress or not, you’ll likely recognize that one of the most popular and recommended types of plugins enables caching for your website. Enabling caching on your website (via a caching plugin) provides a better user experience and can even help your website rank better.
It’s arguably the single most important thing you can do regarding how to increase website speed in WordPress.
But what does a caching plugin do exactly? This caching tutorial will explain everything you need to set up caching on your website and more importantly why you should do it.
What Does a Caching Plugin Do?
Let’s answer the main question straight away: what does a caching plugin do?
Caching itself as it relates to a website refers to saving an instance of the elements which make up that site after they’ve loaded for the first time.

A practical example is say someone comes to your website for the first time.
Their browser loads everything it takes to display your website on that person’s device.
With caching enabled, the browser will create a copy of all of the elements of your website in itself.
Then, if that person leaves and returns to your website at a later date, with caching enabled your website will effectively communicate to the browser that it can just load up all of that previously saved information instead of having to load the entire site fresh. Only the latest content itself needs to load.
This means that on that subsequent visit, the person’s device has a lot less to load from the server your website is stored on.
The result of this is that your website loads much faster, delivering a much better user experience.
The caching plugin itself inserts lines of code into your website’s htaccess file. These lines of code include dictating refresh rates for the various elements which make up your site.
While you might create fresh content in the form of new pages or posts on your site regularly, most of the elements and code which make up your site are static and do not change.
The caching plugin takes advantage of this and designates long periods of time of weeks, months, or even a year before a browser needs to load that content fresh.
Best of all, this is all done with a few clicks on your end via a free caching plugin.
Personally I use W3 Total Cache on my websites and find it to be the best WordPress caching plugin because of the amount of control it gives you.
It’s the plugin I’ll be referring to as I go over my WordPress cache settings next.
WordPress Cache Settings
With the case of W3 Total Cache, it offers a lot more options than some caching plugins as it goes beyond simple caching instructions and instead works as a all-in-one solution for running your site more efficiently.
By default, most of this is configured for optimal performance after you enable the plugin, but let’s go down the list to get a better idea of how caching is working here.
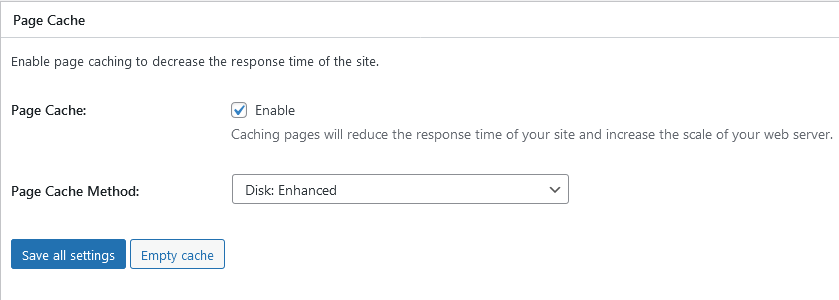
Page Cache

This simply enables your site’s pages to be cached as just discussed. Disk: Enhanced is the recommended method here.
Try measuring your site’s performance before and after enabling this over at https://pagespeed.web.dev/ and enjoy the difference.
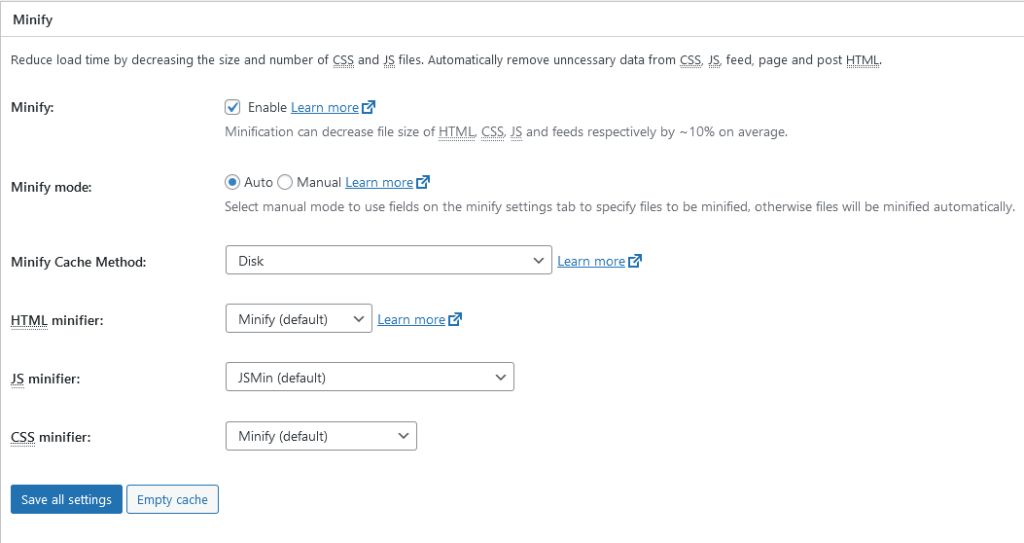
Minify

Minifying your site’s code removes unnecessary blank spaces which allows browsers to read and load your site more efficiently.
Opcode Cache
This caches PHP code specifically which can again drastically improve website loading time.
Database Cache

Your database is where the content you create, so your articles/posts, pages, etc. are stored. Enabling caching here improves database query response time by caching and retrieving past searches.
Object Cache
The object cache is similar to the database cache in that it works on improving fetching information from your site’s database, albeit a bit more efficiently. Typically you only need to enable one or the other.
Browser Cache
This section dictates the terms for storing your site’s various elements in your visitor’s browser.
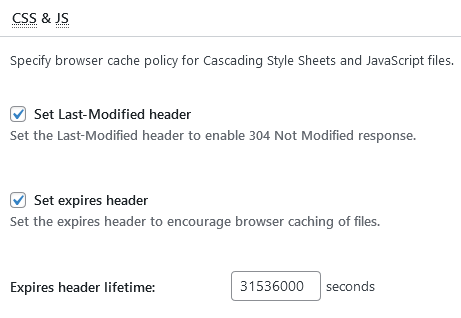
This is where you can get into the nitty gritty of setting refresh rates for various types of elements:

By default, your site’s CSS and Javascript files are set to refresh after 31536000, the equivalent of one year.
This is in contrast to your site’s HTML which has a decidedly shorter refresh rate by default of one hour which makes sense as this makes for the dynamic content of your site’s posts and pages.
Any changes you make here will be reflected in your site’s htaccess file automatically.
CDN
CDN stands for content-delivery-network. It’s makes your site load more efficiently in a manner similar to caching.
With a content delivery network, cached versions of your site’s files are stored on servers around the globe.
This makes loading your website much faster regardless of where someone is located in the world. Instead of someone on the opposite side of the globe having to access your website via just the one server, their browser locates the nearest server geographically your site is stored on and loads it from that.
This dramatically reduces website speed regardless of where in the world your visitors are located.
While W3 Total Cache doesn’t do this for you, it integrates with CDN providers seamlessly, and this can be configured in this section.
User Experience
This section gives a few additional options to boost site performance, such as lazy loading for images. This instructs browsers to load images last after the rest of the page has loaded so that the more important content loads faster.
What Does Delete Cache Mean on WordPress
“Delete Cache”, “Empty All Caches”, “Purge All Caches”… no matter what language is used, they all mean the same thing.
If you’ve made changes on your website and aren’t seeing them being reflected when you load the page itself, it’s likely because your browser is still showing you the last cached version of the page.
Deleting the cache via your caching plugin (oftentimes an option is available at the top of your WordPress dashboard bar) should allow the page to load fresh and any changes you’ve made to be reflected in real-time.
