I always begin these YouTube posts by talking about just how popular the world’s most popular video social network is. It’s the second most popular social network in general after Facebook, and boasts roughly 2 billion monthly users.
There’s an audience for literally anything you’re passionate about, and it’s a great way to drive more traffic to your business or personal site.

One of the best ways to do this is via an end screen; the not-so-originally named feature you can run for the last 5-20 seconds of your video where you can add custom links to videos, playlists, or even your own website.
Today we’re going to breakdown the best possible way to use the end screen on YouTube.
What is the End Screen?
YouTube rolled out the end screen feature in late 2016 to replace the annotations system it previously used. You can still spot a video from before 2017 from the awkward rectangular images and video clips which use to be highlighted via an annotation link. Now they just awkwardly sit there in those videos with no interactions possible.
The end screen is a similar idea, but they’re much more versatile:

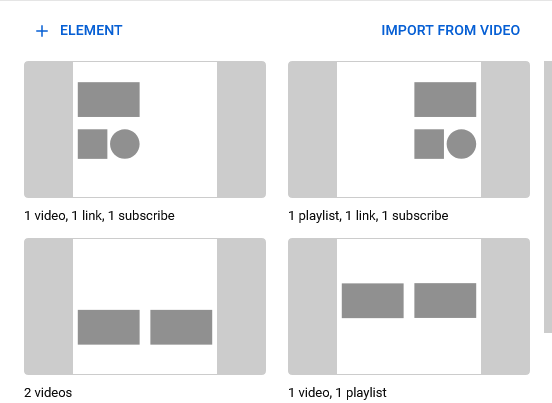
Using them, you can add a link to three or four (depending on the resolution of your video) of the following elements to pop up at the end of your video (though at least one has to be a video or playlist on YouTube):
- Video – Links to a different video. It can be yours or someone else’s.
- Playlist – Links to a playlist. Again, it can be yours or someone else’s.
- Subscribe – This encourages someone to easily subscribe to your channel.
- Channel – This allows you to link to a channel on YouTube, including yours.
- Link – This allows you to link to virtually any website. This can even be a specific URL/page on your website.
You can change each element out as you like at any point, as well, using them to promote your latest or most relevant or important content.
Many creators make a specific image or video to draw extra attention to the elements/links in their end screen.
These “end screen templates” have cutouts/designated spaces for the various elements you might want to include in your end screen.
Best YouTube End Screen Time
You can set the length of your end screen be anywhere between the last 5 and 20 seconds of your video.
Note that just because you can use the full 20 seconds doesn’t mean you need to.
For my own videos, I set the length on a situational basis.
For videos where I didn’t create a specific image/video at the end of the video with an end screen in mind, I make the end screen the minimum 5 seconds to not distract from the content in the end of the video itself.
I have a channel where I create a lot of multipart video series. For videos part of a series but with a specific ending video I’ve created for the end screen (which I tack on to the end of the normal video), I only use about 10 seconds.
In that 10 second video, I encourage people to subscribe, like the video, and comment on it.

Engagement like this is the single best way to get your video to rank better in YouTube, resulting in more views, video revenue, and traffic back to your site for you.
These are all things I covered in my complete guide to SEO for YouTube which I strongly recommend checking out.
Getting back to end screens, when creating a specific image or video where you solicit people to engage in your video like this, you generally want to make your point as quickly and effectively as possible.
Otherwise you’ll either annoy or bore your viewer and risk alienating them from taking that action to begin with.
Just as importantly, you risk losing a view on your next video if someone has autoplay turned on in YouTube (which is the default setting). For channels with a lot of videos or at least a relevant video to the current video, there’s a good chance that YouTube is ready to play another one of your videos next. Shorter end screens retain viewers better than the alternative.
End Screen Template
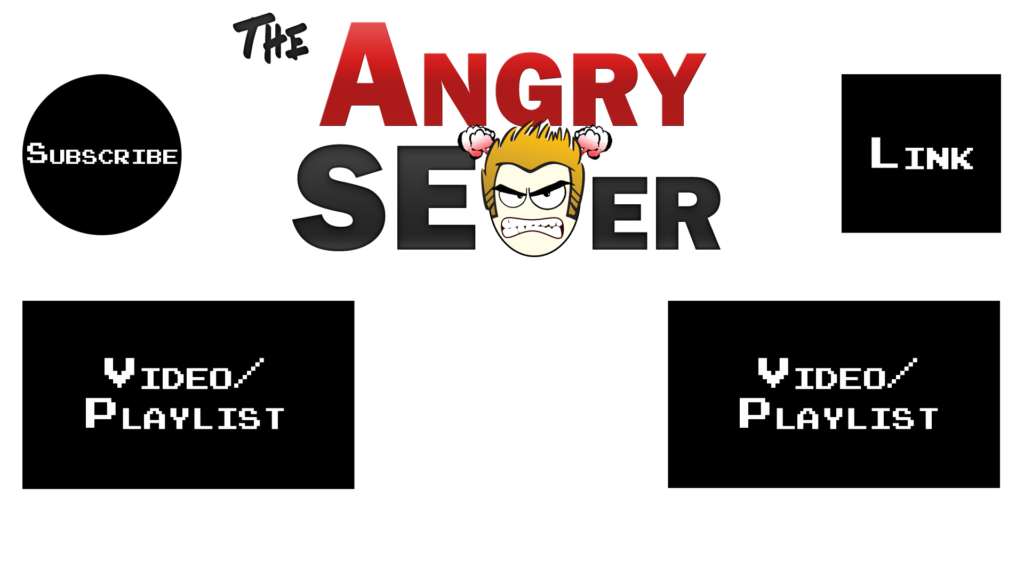
I put together an example end screen template which I use for most of my videos:

Note that these sizes are all specific to a 1920X1080 resolution video. Also note that each “block” on here is just to demonstrate the size of said element in how it appears. It’s the blank space that you want to fill up with your branding.
As an example, in the actual image I use, I include the word “Subscribe” underneath that top left area with an arrow pointing to it to draw some attention to it.
Let me explain my use of this configuration:
- Subscribe – I put this in the top left as this is generally where the eyes gravitate first, making it the most visible element. Growing your channel’s subscriber base is like growing an email list; it pays dividends down the line and should be your first and main order of business, hence the best exposure spot.
- Link – You should always include a link back to your website. As I mentioned before, you can do deep linking rather than having to stick to the top page URL. With that in mind, you can create a specific page for viewers of that particular video or just for viewers of your content on YouTube in general.
- Video/Playlist – These are self explanatory but you should link to relevant video content of yours here. If the video is part of a series, I put the playlist that video belongs to in the lower left spot, with another relevant video or relevant playlist over on the right.
Obviously this is just the layout which I prefer; you don’t even have to include 4 elements in your end screen. You can feature less elements to bring more attention to the ones which do show.
I always have relevant videos and or playlists to link to, so I want to get the most out of the end screen and use all four elements.
You also don’t need to spread your elements out to the corners. I do this to free up the middle space where I show (in my background image at that point at the end of the video) the URLs for all of my social networks and encourage people to check me out there.
With the end screen template I included above, you know exactly how big each element shows up in the video, so the rest of the image can be used however you like.
I like every inch of my end screen to be working for me. Obviously you don’t want it to be TOO busy so that the viewer can’t make sense of what is what, so keep that in mind.
In Conclusion
- End screens allow you to add links to other videos, playlists, your channel, or even your website in the last 5-20 seconds of your videos.
- Creating a designated end screen (from an end screen template, for example) can be a great way to make your end screen/the end of your video look more professional and draw more attention to the elements you include.
- Include a pre-recorded message to play as part of your end screen/the last 5-20 seconds of your video to encourage more engagement.
- Keep your end screen as short as possible to efficiently deliver that message to keep from annoying or losing viewers.
- Prioritize driving more subscriptions to your channel with the Subscribe element in particular.
