Including images on your website can better convey your message and make for a more engaging user experience. Even if not essential to the content of a post itself, I like to include images to break up the monotony which nothing but text brings. It’s not enough to just stick some images on your page, though, knowing how to optimize images for SEO pays huge dividends.
This is because just like your page itself, images can rank well in search engines, potentially bringing you additional traffic to your site. They can also help your page itself rank better if properly optimized.
With all of that in mind, let’s cover the checklist for how to optimize images for SEO.
How to Optimize Images for SEO
Where to Find Images for Your Blog
To begin with, I’m not going to just assume that you know where to get images for your blog to begin with. You likely realize that you can’t just take any images you find across the Internet, stamp them on your site, and call it a day.
There are copyright issues at play, and this can wind you in legal trouble down the road. This is why I get a lot of use out of sites which house millions of cost and copyright free images ready for you to use on your site however you like.

Check out my top 5 sites for where to find images for your blog which are completely free and free of copyright issues.
Each of these sites have advanced search features and huge databases of free images which make finding the perfect image fast and simple.
This is also a much better alternative than having your site flagged or paying two to three figures on average for a single image!
Just be sure to check the terms to make sure you don’t need to attribute the image author and that it’s actually copyright free. 9 times out of 10 it is, but occasionally an image can have additional terms of use which will be detailed in the download area.
Best Image Size for SEO
What I typically do is download the image I want from one of the sites I just referenced, then pull it into an image editor. In my case I use Photoshop.
Even if I don’t want to make any additions or changes to the image, I may want to change the size or resolution. Most of the free image sites allow you to download them at a few stock size options, so an image editor allows me that bit of extra control.
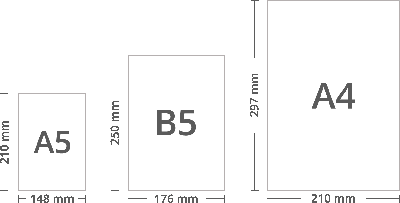
The best image size for SEO is typically going to be the smallest size you can get away with.
So while there’s no perfect image size in most situations, there are some guidelines to follow:
Featured Image Size – WordPress recommends a size of 1200×675 for your post’s featured image.
Don’t Exceed Site’s Width – Most WordPress themes today (see my post on what is the best free WordPress theme) allow you to designate the width of each area of your site. For instance, you might want to devote more width to the content area, or alternatively you might want that sidebar to have a bigger presence, in which case you’d increase the width there.
All this to say, if your blog’s content area’s size is say 700 pixels wide, then it doesn’t make sense to upload images which exceed 700 pixels in width.
I should note that the only exception is when you’re creating an image which is meant for download or at the very least opening in a new tab like an infographic.
Know Your Site’s Width – In the same vein, it’s a good idea to know your content area’s width where images appear.
If it’s, say 700 pixels wide, then you have a guideline for how your images can fit within your content.
For example, if you want your image to roughly embed within a paragraph, you might size it for 300-350 pixels wide and align it to the right.
The point of this is that you can create the image accordingly to optimize it size-wise. In other words, while WordPress makes it simple to resize your images within your content on the fly, it’s inefficient to put a larger image in your content, then shrink it.
As I discussed in my recent overview of how to increase website speed in WordPress, the data sizes of the files loading on your website have a huge impact on how quickly the page loads.
With that in mind, create your images to the best/intended sizes from the start to avoid uploading larger than necessary images (in both image AND file size).
Best Image Format for SEO
The most common file formats for images are JPEG, PNG, and GIF.
Each one has a specific purpose, so the best image format for SEO is situational based and comes down to what type of image it is. Here’s a quick guide:
JPEG – JPEG is the ideal and best compressed image format for more complex images with lots of colors. For photos and more complex illustrations, save the file as a JPEG.
PNG – A PNG is for far more simple images. PNGs have a more limited color range and are ideal for images with clearly defined edges. If you have a text based image (like an infographic), a PNG is the way to go.
PNGs also allow you to save the image with a transparent background, making them easy to embed on a web page without having a solid white background or a background in general.
GIF – This is the most straightforward; a GIF is used for images with a brief animation.
If you try to save a complex photo as a PNG, you’ll find that it will create a much larger file size with no noticeable improvement in quality. This is why it’s important that you follow those guidelines.
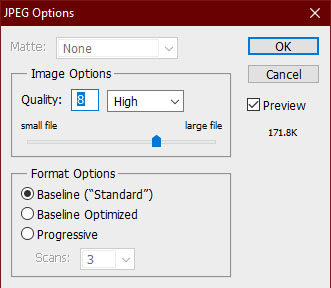
It’s also worth noting here that photo editors like Photoshop allow you to choose the image quality when outputting them.
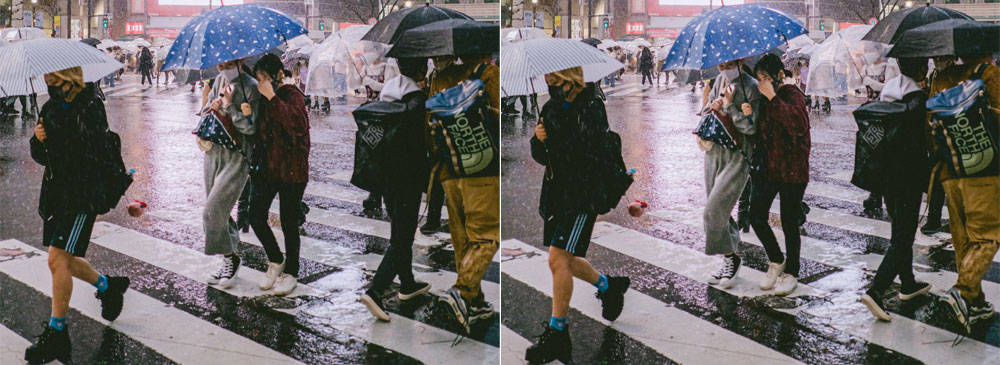
Above are two versions of the same image rendered at different qualities.
The left is 60% and the right is 100% in terms of quality setting. While the images look virtually identical, the one on the right renders at nearly 3 times the size.
I find that a quality of 60 works gives you the best quality to size ratio with JPEGs in Photoshop.
How to Name Images for SEO
Lastly, when you’re rendering the image itself, you have to supply a file name for it.
It’s a good idea to be precise with the name of your image to better convey to search engines what that image is of. So “girl on tokyo train” is better than “girl on train” or just “train”.
It’s also preferred to put dashes between words in the title of the image, just like with a URL.
By using the “Save for Web & Devices” option to render, Photoshop will automatically put dashes between every word you type (in place of a blank space).
This will ensure that your image is easily interpreted by both your visitors as well as search engines.
Alt Tag
Last but not least, when you upload your image to your website, remember to include its name/keyword as the alt tag.
Browsers rely on this to show when either the image is broken or images are disabled.
This helps with the accessibility of the page as well as better conveying to search engines as to what your image is about.
Search engines will use both an image’s title and its alt tag to identify the context and include it in image searches accordingly.
Summarizing How to Optimize Images for SEO
- Use free image sites to get the exact image(s) you need without paying or running the risk of copyright issues (be sure to check with every image you download and use, though).
- Know the size of the content area of your website and size your images accordingly.
- Don’t upload a larger than necessary image needlessly (infographics are one of the few exceptions).
- JPEGs are ideal for complex images like photos. PNGs are for simple images with clearly defined edges and limited colors. GIFs are for animated images.
- Saving an image with an unnecessarily high quality setting will create a larger file size without upgrading visible quality.
- Name your images with specificity, after keywords, and include a dash in place of spaces with multiple words.
- The alt tag should reflect the image’s name and is used when the image cannot load properly. This provides additional context to search engines regarding what your image is about and what search queries it should appear for.

Pingback: How to Rank Images in Google - Angry SEOer